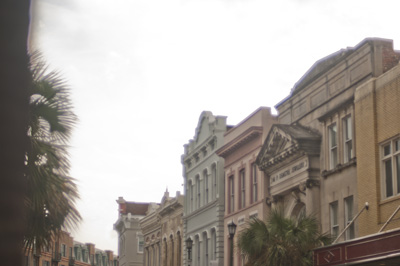
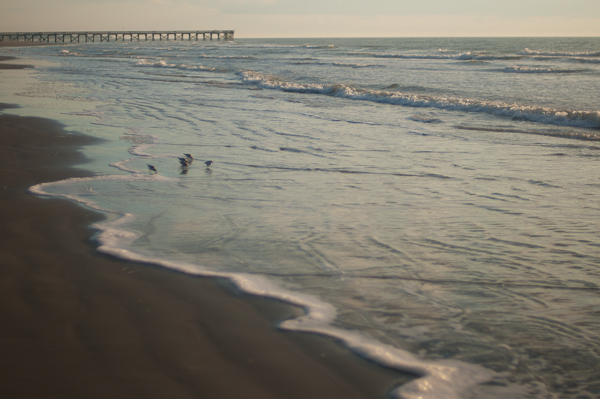
Showing posts with label Charleston. Show all posts

Thursday, February 28, 2013

Candied Citrus Scones


I’m swamped with editing wedding photos from my dear friend Kelli’s wedding (350 down.... only 100 to go!), but I still wanted to share these wonderful candied citrus scones.


When I lived in Charleston, one of my favorite downtown spots was a store on John Street called Macaron Boutique.  They had amazing macarons (of course), and breakfast pastries, like an almond pain au chocolat (!) and candied citrus scones.


I haven’t been up for trying to make my own laminated doughs at home here in TX yet (I simply don’t have the space in our overstuffed apartment freezer), but I do make scones quite often.


After making the citrus granita, I found myself with a good amount of citrus peel.  I couldn’t bear to simply throw it away.  Instead, I candied it.


Candied citrus is fabulous, all on it’s own, rolled in granulated sugar or even dipped in chocolate. But I decided at least part the citrus should go into a batch of scones & be reminiscent of my favorite Macaron Boutique candied citrus scones.


I candied just the rind of the lemon, the cara cara oranges, and the Minneola Tangelo knowing that the lime & the grapefruit flavors may be a bit too strong for the scones.


My stand-by scone recipe, which I’ve posted previously about with the Zucchini Scones  and the Bittersweet Chocolate & Cherry Scones, was easily adapted for the chopped candied zest addition and for my substitution of gluten free flour.


Usually, I’m a big fan of glazed scones (I do have an insatiable sweet tooth), but Macaron Boutique doesn’t glaze theirs.  They sprinkle the scones, prior to baking, with a coarse sanding sugar instead. The sugar melts slightly in the oven & forms a nice crunchy, slightly sweet crust.  I promise, you won’t even miss the glaze!


After the photoshoot & a few taste tests, these scones became interstate travelers. I packed them as a quick and easy breakfast option while I drove from TX to ND.  The were a welcome, much more gourmet item than anything I could have found at any of our gas station pit stops.


CANDIED CITRUS

Citrus Peel (I used 1 lemon, 2 cara cara oranges, and 1 Mineola Tangelo)
16 fl oz Water, plus additional for blanching
2c/14 oz Sugar
splash lemon juice

  1.  Cut the citrus peel (rind & pith) into long strips (or alternately, into small bits, but I prefer to chop the peel after it’s been candied).  
  2. Place the strips into a non-reactive, stainless steel sauce pan.  Cover with water.  Bring the pan to a boil over high heat & allow to boil briefly.  Drain off the water. 
  3. Re-cover with fresh water & repeat the boiling process until the peel has been blanched 3 times.  This three process blanching will remove most of the bitterness from the peel and pith.  If you leave the citrus pieces in very wide strips, you may want to blanch it a 4th time. 
  4. Return the blanched peel to the same sauce pan.  Add the sugar, water & splash of lemon juice.  Stir briefly to combine.  
  5. Bring to a boil, then reduce the heat to a simmer & allow the peel to simmer until tender and almost translucent, 60-80 minutes.  Do not stir.  Do not allow the sugar syrup to caramelize. 
  6. Remove from the heat & cool.  
  7. Store the candied citrus, in the liquid, in the refrigerator until ready to use.  

Note: any leftover candying liquid would be wonderful added to a cocktail!


CANDIED CITRUS SCONES

4 oz (1 stick) Butter, cold
2 c Flour (I used AP Gluten Free Mix)
1/4 c Sugar
1/2 tsp Baking Soda
2 tsp Baking Powder
1/2 tsp Salt
1 heaping cup Candied Citrus, chopped
2/3 c Buttermilk
Coarse Sanding Sugar, for garnish

  1. Using a box grater, grate the butter onto a plastic-wrap-lined plate.  Transfer the butter to the freezer for 10 to 15 minutes, or until the butter is hard.  
  2. Preheat the oven to 400 F.  Line to baking sheets with parchment paper. 
  3. In a large bowl, combine the flour, sugar, baking powder, baking soda, and salt.  
  4. Gently toss the frozen butter shards, by hand, with the dry ingredients, working quickly so that the heat of your hands does not melt the butter.  
  5. Add the chopped citrus peel & stir until just combined.  
  6. Add the buttermilk & mix quickly with your hands.  Work the dough only until the mixture comes together & there are not pockets of dry ingredients. 
  7. Divide the dough in half.  Shape the first half into a ball, then flatten into a disk.  Place the disk onto a lightly floured surface.  Use a bench cutter or knife to cut the disk into 8 triangles.  
  8. Place the triangles onto the parchment lined baking sheet.  Sprinkle with a little coarse sanding sugar.  
  9. Repeat the process with the second disk of dough.  
  10. Bake the scones for approximately 15 minutes, or until golden brown.  
  11. Cool slightly & serve. 
  12. Leftovers will keep for up to 3 days in an airtight container at room temperature.  To re-crisp leftover scones (or to reheat), place into a low temp oven until heated through.  Please don’t microwave :)  


Wednesday, November 28, 2012

A tale of 2 salads & Charleston outtakes

After all the overindulging Thanksgiving typically brings, it is nice to have a few healthy, but satisfying & delicious recipes in your repertoire.  Especially as we move into the busy holiday season, it is important to take care of ourselves!


In my last post I shared many photos of the Charleston Photo Workshops. But, I also wanted to share a few of my favorite non-workshop images (caution, there are a good number of images), along with two participant-requested salad recipes.  


Charleston Outtakes
I truly believe part of my heart will always live in Charleston.  I don't know if I really realized how much I have missed the area until I came back (this time as a visitor).    Charleston will always be a special place to me.   I appreciated being able to visit the familiar sites of my favorite city, as well as being able to reconnect with dear friends whom I greatly miss!


The Isle of Palms Beach in the morning(s), when I probably should have been sleeping....  But there is something almost therapeutic about the beach, especially in the morning....


The Isle of Palms Beach in the afternoon...


Lunch at 181 Palmer (the downtown CIC restaurant) with Helene & Clare (and then at Relish in North Charleston with Sandra & Ashley, though I only took cell phone pictures there).


Lunch with Liz at Butcher & Bee 
(I may forever dream of the chicken liver mousse with blackberry jam).


Visiting Kudu Coffee (yay for an actual coffee house!).


Lentil Salad with Roasted Beets & Apricots; Greek Quinoa Salad 
And now back to those salads, as previously mentioned.  When you're preparing food for an all-female group, there's bound to be a few salads.  But we didn't want any run-of-the-mill salads...  They needed to be different (not just lettuce based) & beautiful & above all, tasty. 


This Greek quinoa salad and lentil salad with roasted beets & apricots were two of my favorites.  I enjoyed them so much that I re-created them at home, both so that I would not forget the recipe, and also so that I could eat them again!  


Both salads are easy to make (and easy to modify to your taste preferences).  They last well in the refrigerator, if they aren't eaten immediately.  Each salad works as a side dish or as a main dish--since they're quinoa and lentil based, they have good levels of protein. They are both vegan, until you add the optional cheese, but that does not make them any less delicious!  


After all the Thanksgiving indulging, I believe salad lunches are quite perfect :)  Everything in moderation (including moderation).  And I promise, these salads won't feel like moderation.!  

Lentil Salad with Roasted Beets & Apricots
To roast the beets, I simply wash and peel the beets before cutting them into cubes, tossing them with olive oil & salt and pepper, and roasting them in a 375 F oven for approximately 30 minutes (or until they're caramelized & soft).  

1/2 c French lentils, rised & picked over
1 c water
1 c roasted beets (see note above) 
1 whole scallion, coarsely chopped
1/2 c dried apricots, chopped
1 Tbl chopped parsley
7 Tbl simple vinaigrette (recipe follows)
crumbled goat cheese (optional) 

1.  Combine the lentils and water in a sauce pan.  Bring to a full boil, then reduce the heat and let them simmer, uncovered, for approximately 18 minutes.  When they are done, they should still have a bit of "bite" & not be mushy at all.  Remove from the heat and cool completely.  

2.  Once the lentils have cooked and cooled, add the beets, scallion, & apricots.  Toss well.  Add vinaigrette & parsley.  Gently stir to combine.  

3.  Serve room temperature or chilled.  Crumbled goat cheese may be added on top, if you wish.  Store leftovers in the refrigerator.  Additional vinaigrette may be necessary after the salad has sat in the refrigerator.  

Greek Quinoa Salad
When I created this salad for the photo workshop, it was for a picnic/lunch-themed photoshoot.  I had several goals: 1) to make a salad using things we already had, 2) to make a salad that would be tasty for participants to eat after they finished photographing, and 3) to make a salad that would be colorful and photogenic.  The result was this spin on a greek salad.  In the original salad, I included chopped olives, but to be completely honest, I HATE olives.... So I left them out of my re-creation :) If you like them, feel free to add olives yourself.

1 c Dry Quinoa, rinsed
2 c Water
1.5 c Cucumber wedges
1.5 c red & yellow grape or cherry tomatoes, cut in half if grape tomatoes or in quarters if cherry
1.5 whole scallions, chopped
2 Tbl chopped parsley
6 Tbl simple vinaigrette (recipe follows)
1/2 c crumbled Feta Cheese (optional) 
Black olives, chopped (optional)
  
1.  Cook the quinoa and water according to the package directions.  Once cooked, remove from heat, fluff with a fork & allow to cool completely.  

2.  Once the quinoa is cooled, add the cucumber, tomatoes, scallion, parsley & vinaigrette. Gently stir to combine. 

3.  Serve room temperature or chilled.  Add the crumbled feta cheese & optional olives just before serving.  Store leftovers in the refrigerator.  Add additional vinaigrette as needed.  

Simple Vinaigrette 
Once I learned how to make simple vinaigrette, I completely stopped buying store-bought salad dressing.  Instead, I keep small mason jars of variations on this vinaigrette in my refrigerator.  All I do is let it warm up a bit and shake it before serving.  This recipe makes enough for both the lentil and quinoa salads, with a little leftover as well.  

1 tsp Dijon Mustard
2 Tbl Red Wine Vinegar
4 Tbl Olive Oil
Pinch of Salt & Pepper 

1.  Combine all ingredients in a mason jar.  Tightly screw on the lid & shake to combine.  

2.  Pour over salad (less is more).  Store any leftovers in the refrigerator.   

Note: most of the time, I just eyeball the measurements in the jar.  1/3 of the jar gets vinegar, 2/3 of the jar gets olive oil.  Add a squirt of dijon and a little salt & pepper.  Shake the jar well & it's ready to serve.  So simple.  Sometimes, I add a little grated garlic or shallot to give it some extra zip...  


Tuesday, November 20, 2012

Honey Pecans & Charleston Photo Workshops Recap

Honey roasted pecans  

For the past nearly 3 weeks, I've been back in Charleston at a beautiful beach house on Isle of Palms.

our beach house for the workshops

I've been working as the kitchen manager/chef for two photo workshops taught by food photographers Helene Dujardin, Clare Barboza, with the second workshop also featuring food stylist Tami Hardeman.
For each workshop/retreat, we had 12 women staying under one roof, and eating/sleeping/breathing/learning the ins and outs of food photography.   These women, although strangers to begin, formed tremendous bonds & great friendships throughout the course of the weekend.  While we had a few "local" participants, most flew in from places as far away as New Zealand, Hungary, Japan, and Canada!  

TL: Workshop 2 Ice Cream Bar; TR: Melissa, Stacy & Alysha at the Workshop 1 First Dinner
BL: Kriszti, Karen & Tiffany Picnic shoot WS 1; BR: WS 2 First Dinner

during the intro information sessions

My role was to keep them well fed (heaven forbid anyone should attend a food photography workshop and be hungry), as well as to assist with coordinating food for the food photo shoots.   I had some help  from a few Culinary Institute of Charleston students who volunteered their time.  I couldn't have done it without them!
TL: Dina setting up a shot; TL: Helene holds a reflector for Danielle
BL: Helene & Clare assist students at WS2; BR: Maggie checks her image at the Farmers' Market


TL: Claire's Antipasto Shoot set up; TR: Eggs and Radishes from the Farmers' market
BL: a student's dessert shoot set up from WS 1; BR: Tami helps Chiaki with a wrap for the picnic photo shoot 

Outside of the food photo shoots set up in the beach house, there was also down time to visit the beach (we were staying at a beach house, after all!)...

Top: Shadows of Dina & Tiffany as they take photos at the beach
BL: Christina & Julie walk towards the beach; BR: Liz captures a few shots of the foggy beach

...a chance on Saturday morning to document the bounty of the Charleston Farmers's Market...

TL: a barista making my mocha; TR: part of the market
BL: Nigel, the ENORMOUS bullmastif we met at the market; BR: my finished mocha 

 TL: heirloom tomatoes; TR: beautifully colored radishes
BL: lovely beans ; BR: cheerful zinnias 

...and the opportunity to photograph & eat an amazing meal at Lana in Downtown Charleston...  We were given free reign to take photos in the restaurant (anywhere we wanted) before sitting down to a fantastic meal.


TL: Lots of cameras at this restaurant! TR: Kyle gets a shot of the bar
BL: Libby takes a photo; BR: a self portrait

interior shots at Lana

T: Helene talks to the guys on the line
BL: Chef John Ondo; BR: table set & special menu for our group 

T: Bread sliced for table service
B: Appetizers for the first workshop

The amazing vegetable plate at the first workshop's dinner

Dessert!
TL: Gelato (Gluten Free!) from WS 1; TR: Olive Oil Cake from WS 1
BL: Honey Panna Cotta with Figs from WS 2; BR: Gelato consumed from WS 1

 TL: Bill, Helene, & Julie from WS 2; TR: Tami from WS2
B: Kyle & Stacy from WS 2

T: Great laughs from Stacy, Alysha, Libby, Kriszti, and Tiffany from WS 1
B: Claire, Amy, and Anna from WS 1 

 T: Liz & Lisa from WS 2
M: Liz, Lisa & Maggie from WS 2
B: Chiaki from WS 2 (with back of Sylvie & Kyoko's heads)

Helene and Clare make it their mission at these workshops to have each participant develop their own food photography style, rather than just copying how Helene and Clare shoot.  At the end of the workshop, due to participant request, Helene and Clare did demonstrate how they set up a shot (with Tami assisting at the second workshop).  Tami also brought out her styling tweezers (where her blog gets it's title) and showed us how to style (usually not beautiful) beef stew and how to construct a sandwich for styling.  

 TL: The tweezers come out for styling beef stew during WS 2; 
TR: Helene makes a poached egg for Anna to shoot during the brunch photo shoot of WS 1; 
BL: Helene sets up a test shot for her shrimp and grits demo with Tami
BR: Tami puts the finishing mustard garnish on the sandwich she built for Clare to shoot

Clare's rustic picnic set up, with the sandwich built & styled by Tami

To close the workshops, we had one final 3-course dinner on Sunday night. One last celebration before everyone parted ways....  

TR: 2nd course of Roasted Steelhead Trout over Rosemary Thyme Roasted Potatoes with a green salad
B: Coriander Lemon Pot de Cremes with Black Pepper Shortbread 

I am so very thankful for the opportunity to work and learn alongside such amazing, talented women.  It has warmed my heart to have these new friendships & to see how their photos (and confidence) improved throughout the course of the workshops.  I look forward to seeing their future work!   


Much of the food I prepared during the course of the workshops were things of Helene's creation.  These honey pecans, which we served on the opening night's ice cream bar, are one such item.  Except, we made them without a recipe (*gasp*).  Several participants have requested a formula for the honey pecans, so I have come up with one.  


While they are really quite simple to make & wonderful to eat on their own, they also make a wonderful addition to an ice cream sundae already topped with homemade sauces.  Or, like the Japanese ladies did during the second workshop, sprinkled on top of a freshly toasted, cream cheese smeared bagel.  Enjoy!  


Honey Pecans
with Thanksgiving in just a couple of days, these versatile nuts could be a welcome addition to any menu.  Eat them on their own.  Toss them into a green salad.  Top a sweet potato casserole or pumpkin with them.  

3/4 c Pecans (approx. 2.8 oz)
1 Tbl Honey (approx. 19 g)

1.  Preheat oven to 350 F.  Line a baking sheet with parchment paper.
2.  Mix the pecans and honey together until the pecans are well coated.  Pour out onto the prepared baking sheet.
3.  Roast for approximately 10 minutes, or until dark, but not burned.  Cool & chop, if desired.
4.  Store in an airtight container.