Showing posts with label Summer. Show all posts

Saturday, September 6, 2014

August 2014, in pictures

I may have gone blog-silent (intentionally) for the month of August, but it still was an exciting month, filled with food & travels. Part of the reason for my travels was to see some of my family, but I also am under the care of an excellent doctor in Warren, MN. He's the more functional medicine oriented doctor who started me on this new lifestyle (basically a version of the Autoimmune Protocol of paleo) and oversees my supplements etc. Periodically I need to travel back for follow up appointments with him & some additional treatments. I planned this trip to be a little longer than most I've done in the past, specifically because I didn't want to spend the whole time back in the doctors office. Both my sisters were home for the first portion of the trip & my husband came for the Labor Day weekend. In between treatments, we spent some time at the family lake cabin on Tulaby Lake in Minnesota, and drove all the way to Chicago (and back again) to help my youngest sister move.

Here's a few favorite iPhone pictures, some of which have been posted on Instagram and Steller.  Side note: Steller is fast becoming one of my favorite apps! Go check it out if you haven't yet.


I made a couple pavlovas with lemon cream cheese & strawberries for some dear friends' send-off party. Though I couldn't have a taste (dairy, sugar, corn, egg whites etc…), everyone else really enjoyed eating them!  
Recipe can be found here (I just added some lemon juice & zest to the filling). 

An experiment in making grain-free and nightshade-free stuffed cabbage, using "no-mato" sauce. Yum! 

Pretty lingerie decorated cookies for a very special bachelorette party 
(click on the picture if you'd like to see it in a larger size). 

Now that I finally own a spiralizer, I want to spiralize everything! Zoodles for everyone! 

Mollie: Oh, you were planning on doing some yoga? I just thought this pretty pink mat was for me to lie on…. 

Sisters slacklining. I tried it, but I'm not very good (and it hurts my feet).  

Watching my youngest sister water ski.

Jumping into freezing cold water Tulaby Lake.  

Dinner on the screened-in porch at the cabin. The grilled marinated pork, with balsamic stone fruit, mashed butternut squash & sautéed spinach were all delicious (and autoimmune protocol compliant)!  

My mom makes waterskiing look SO easy…  

Our oven at the lake doesn't work, so one afternoon,  I created this no-bake stovetop Blueberry Peach Crisp 
with coconut almond crumble (Autoimmune Protocol compliant, with the reintroduction of almonds). 
Stay tuned for the recipe in the next post!  

We made a version of Mickey Trescott's Sear-Roasted Pork Chops, only we grilled them. 
They were so delicious that I forgot to take a picture after they were cooked!  

Now that I've successfully reintroduced a few foods, 
I'm cautiously venturing into the world of autoimmune protocol/paleo baking. 
This paleo zucchini bread was pretty good, but needs a bit of tweaking before I'd share the recipe. 

Driving to Chicago with my youngest sister & her new roommate.   

Pre-baseball game dinner at Rockit Burger. My bun-less, cheese-less, nightshade-free burger 
with sweet potato fries was a great Autoimmune Protocol option, 
though I did *really* want to try my sister's "breakfast for dinner" burger 
with doughnuts for buns, fried egg & bacon….

 Attending my first ever professional sporting event 
(and I unintentionally dressed in the colors of the home team).

 Fire! Our first experience at a Japanese steak house for Hibachi. I
 thought it would be a cross-contamination nightmare,  since I can't eat gluten, soy,
 dairy, nightshades etc. But thankfully, they cooked my meal of steak & veggies first. 

 Driving through the Twin Cities on the way back to ND. 

Somewhere in Minnesota. 

 Grilled marinated flank steak, roasted green beans & roasted potatoes for dinner at my parents house, 
where I tried unsuccessfully to reintroduce white potatoes.  *sigh, perhaps someday…  

Back to the lake for Labor Day Weekend--this time with husband too!  

Another dinner on the porch at the lake (Autoimmune Protocol compliant, again). 
Shrimp Scampi (Grandpa's favorite) over cauliflower puree.

Perfectly calm water during the golden hour. 

 Another gorgeous sunset. 

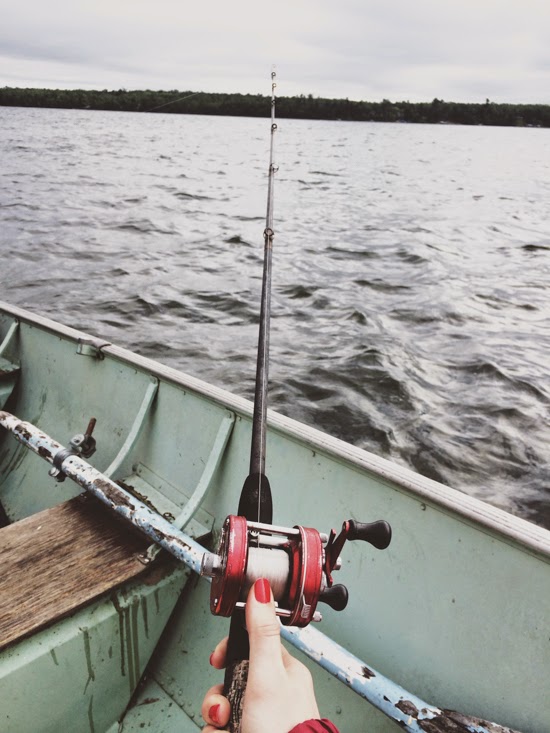
Fishing with husband in Grandpa's boat. I did manage to catch a couple fish! 
Though, I still need someone to bait my hook & take the fish off ;) 

Husband's catch: sunfish & crappies.

Husband's catch, cleaned, scaled, stuffed with lemon & herbs, ready to be eaten! 
farm Lake to table at it's finest! 

With the successful reintroduction of eggs (though not in large quantities), I've started making paleo mayo! 
Yay, condiments! This recipe from "The Healthy Foodie" is my favorite (and SO easy). 

Fun way to display vintage fishing lures at an antique store in Dorset, MN. 

Husband ate the most amazing looking churro ice cream cone in Dorset, MN.
I, on the other hand, ate an apple… 

 The end of another perfect lake day. 


Hot cereal for breakfast is a favorite childhood lake memory. 
Since I've successfully reintroduced rice, I splurged on some cream of rice cereal 
with blueberries & coconut milk (though I don't plan to eat rice often).  

The screened in porch just might be my favorite spot at the cabin. Miss Mollie agrees, too.  

Husband swims, while I just dip my feet in and contemplate the merits (or lack thereof) of cold lake water…. 

Goodbye, lovely lake cabin! Until next year! 

Stay tuned for my next post on making stovetop Blueberry Peach Crisp! 

Thursday, July 3, 2014

Patriotic Panna Cotta (AIP, Low FODMAP)

Update 7-31-15: a low FODMAP variation is now listed at the bottom of the recipe! 


Most every 4th of July (Independence Day for the US) of my childhood was spent at my family's lake cabin.  Sometimes we were on our own, just my parents, sisters, grandparents and me. Sometimes friends joined us.


The morning was spent getting up early and decorating our boat (as well as ourselves) with patriotic red-white-and-blue decorations before participating in the lake-wide boat parade where all the other decked out boats would lazily motor around our smallish lake. Our portion of the beach would be filled with many smaller American flags we stuck into the sand.


The food choices for the day would vary, but there was always a giant spread with many. Sometimes burgers, sometimes fish & even for several years, before the oven in the beloved vintage stove quite working, roasted a turkey with all the trimmings.


Once we kids were old enough to stay up, sparklers and fireworks became an important part of the evening. We would douce ourselves in bug spray & cover up as much skin as possible to ward off the mosquitos. When the sparklers were all used, we would move on to the smaller fireworks & then to a few bigger ones. My grandma would sit on the screened-in porch (blissfully mosquito free) and take notes on which particular fireworks we liked the best, so that we would know which ones to buy the following year.


Somewhere throughout the years, I started making a patriotic dessert. I'm fairly sure the first year's dessert was a fruit salad containing un-pitted cherries…. Luckily, my skills (and forethought) improved as the years progressed. Many desserts were inspired by things I'd seen in Martha Stewart Living magazine. One year, the cover of MSL featured the most gorgeous fruit tart, decorated to look like an American flag. While I couldn't make it exactly like the cover image, due to ingredient unavailability, my version became a favorite among family & friends. Pastry crust, chocolate, cream cheese/whipped cream filling, fresh berries…. I make some sort of variation on it nearly every year (you can find my recipe here).


As I was brainstorming something to make this year, I thought a bit sadly about my favorite fruit tart. Pretty much the only component of that tart I'm able to eat this year is the berries…. Nothing against berries, I just eat them most every day & thus have a hard time seeing them as a special Independence Day treat. Then I thought of panna cotta & how easy it would be to make a panna cotta out of coconut milk & add berries to it, sort of similar to the nectarine buttermilk panna cotta I made last year.  While I might be mourning my fruit tarts just a little bit, I'm consoling myself with the realization that this dessert is *much* faster to prepare (and less mess) and it's actually good for me!


Patriotic Panna Cotta / Coconut Panna Cotta with berries 
yields approximately 4-6 servings, depending on how big your vessels are

1 can (13.5 oz) Organic Coconut Milk (full fat)
1 Tbl (7g) grass-fed gelatin (like this one)
1 Tbl / 31g Organic Honey (local, if you can find it)
1/2 tsp Vanilla Bean Paste (optional for AIP)
around 1.5 c / 200g mixed organic berries (I used blueberries, strawberries & raspberries)

  1. Place the coconut milk nto a small sauce pan. Sprinkle the gelatin over the coconut milk & mix gently--I usually use my fingers & break up any clumps that I can.  Set aside & allow the gelatin to bloom for 10 minutes. 
  2. Meanwhile, prepare your vessels & berries. Place the vessels onto a pan (for easy transport). Fill each cup approximately 1/3 to 1/2 full of berries (either whole berries or cut). 
  3. Heat the sauce pan over medium heat & whisk constantly until all the gelatin just melts.  Remove from the heat and immediately add the honey & vanilla.   
  4. Give the coconut mixture a stir & then portion equally into the berry-filled vessels. 
  5. Refrigerate at least 2 hours before serving. The panna cotta may be made a day or two in advance, just cover the dishes with plastic wrap & store in the refrigerator until ready to eat. 
Note:
  • Right now I'm trying to incorporate lots of gelatin into my life (it's full of protein, can help heal your gut, and is good for hair/nails/skin, just to name a few benefits), so I've made this panna cotta a bit more firm than usual. If you like, reduce the gelatin by half to produce a softer "custard." 
  • This recipe could be easily doubled or tripled for a crowd. 

Low FODMAP Variation
1 can (13.5 oz) Coconut Milk, full fat & free from additives
1 Tbl (7g) grass-fed Gelatin
1 Tbl / 31g Organic Grade B Maple Syrup (optional, could be omitted for SIBO protocols)
1/8 tsp Vanilla Powder
around 1.5 c / 200g mixed organic Low FODMAP berries (I used blueberries, strawberries & raspberries)

  • follow the same instructions as above, substituting the maple syrup for the honey & ensuring to use only low FODMAP fruits. 

This post contains affiliate links. Thanks for supporting Sweet Treats

Saturday, June 14, 2014

Sweet Potato Paletas (AIP)


It’s been hot. Super hot. Like +110 F hot, and it’s only June..... While I wouldn’t discriminate against a frozen treat any time of the year, I especially crave them in the summer time. Since I cannot just run to any store or shop & purchase a frozen dessert that would fit within my unique dietary guidelines, I have to make my own. I have a feeling my ice cream bowl will be working overtime, if only I can find a way to clear enough freezer space to actually freeze it. But, I did manage to clear enough space for my popsicle mold, so that’s where I’m beginning this summer. 


Paletas were not something I’d heard of until I moved to the southern border of Texas--they’re the Mexican version of a popsicle, only not usually as sweet as their American counterpart. We’re able to get paletas in just about any local gas station or grocery store & they come in much more interesting flavors than the regular popsicles I was use to seeing. Coconut. Watermelon. Pineapple. Pecan. Rice Pudding. Pina Colada. Tamarind. Fruit flavors spiced with chile. (The rice pudding ones use to be my favorite....).


Sweet potatoes have become one of my staple foods--most often either baked or roasted. Since paletas already come in such interesting flavors, I thought that adding sweet potato variation to the mix wasn’t such a stretch :)


Traditional paletas aren’t super sugary & my sweet potato paletas follow suite--they get their limited sweetness from the sweet potato & the apple juice. Even with the limited sweetness, they are cold & very refreshing, especially on a hot day when you’re just dying for an ice cream.


If I wasn’t following a sugar-free diet, I’d add a couple tablespoons of honey or maple syrup. Or maybe some candied pecans. If you prefer a creamier pop, adding some yogurt (whether sweetened, or plain) would also work.


One final note: I made & styled/photographed these sweet potato paletas while watching Diane Cu & Todd Porter of “White on Rice Couple”  give a 3 day food styling & photography workshop on Creative Live. While the presentation isn’t free anymore (unless CL rebroadcasts it), I’d highly recommend checking it out if you’re interested in furthering your photography skills. I learned some fun new tips & was reminded of some things I should have been remembering anyway. 

behind-the-scenes image of shooting these paletas while watching Creative Live

Sweet Potato Paletas 
Yields approximately 12 pops, depending on mold size 

1 large sweet potato (mine weighed just under 1lb, pre-baking & around 12 oz after) 
4 Tbl Apple Juice
1 1/2 c (13.8 oz) Coconut Milk (beverage, not the culinary coconut milk from a can) 
2 tsp Cinnamon
1 tsp Vanilla
optional: sweetener of choice (especially if you’re not following a sugar free diet).... I’d use a couple tablespoons of honey or maple syrup, if it was allowed for me.  OR add a little vanilla coconut yogurt.  
  1.  Wash sweet potato & pierce the skin with a fork or sharp knife. Place sweet potato into an oven safe dish & roast at 350 F until fork-tender. (Mine took approximately 60 minutes in our toaster oven). 
  2. Once cooked, let the sweet potato cool completely (I put mine in the refrigerator overnight. 
  3. After the potato has cooled, remove the skin & add to a blender or food processor.  Add the apple juice, coconut milk, cinnamon & vanilla.  Process on high speed until well blended.  Add additional coconut milk if the mixture is too thick. 
  4. Pour into your popsicle molds, leaving some headspace at the top to allow for expansion during freezing.  
  5. Place in the freezer and freeze for 2 hours.  
  6. After 2 hours of freezing, insert the sticks. Continue to freeze for an additional 10-24 hours.  
  7. To unmold, fill a large bowl with warm water. Set the frozen mold into the warm water for 30 seconds & remove the mold. Gently lift the paletas out of the mold & place onto a parchment lined baking sheet. Top with a second layer of parchment & allow to freeze for 30 additional minutes. 
  8. After the additional freezing, the pops are ready to be consumed. If not eating right away, wrap them well & store in the freezer. 

For more information on paletas, this article is really helpful!