Showing posts with label Vegetarian. Show all posts

Friday, March 31, 2017

Avocado “Toast” + a Yucan Crunch giveaway (AIP & Paleo)

Avocado “Toast” + a Yucan Crunch giveaway (AIP & Paleo)

I went AIP before the big “avocado toast” craze began; however, thanks to Mission Heirloom’s Yucan Crunch crackers, I’ve been able to enjoy my own allergen-friendly version.

Avocado “Toast” + a Yucan Crunch giveaway (AIP & Paleo)


In December 2015, I had the pleasure of visiting Mission Heirloom in Berkeley, CA. Various AIP friends had highly recommended the paleo restaurant with many AIP options, but they also raved about Yucan Crunch crackers. I made it a point to try the Yucan Crunch and absolutely loved it—they really remind me of triscuits. I bought a bag on the spot & used it for breakfasts and snacks throughout the rest of our trip.

Avocado “Toast” + a Yucan Crunch giveaway (AIP & Paleo)

Fast forward to now and I’m still a huge Yucan Crunch fan. After my initial stash ran out, I ordered it several more times from the Mission Heirloom website, but luckily, procuring some is even easier these days because Yucan Crunch is now available on Amazon! And they're even Amazon Prime eligible!

Avocado “Toast” + a Yucan Crunch giveaway (AIP & Paleo)

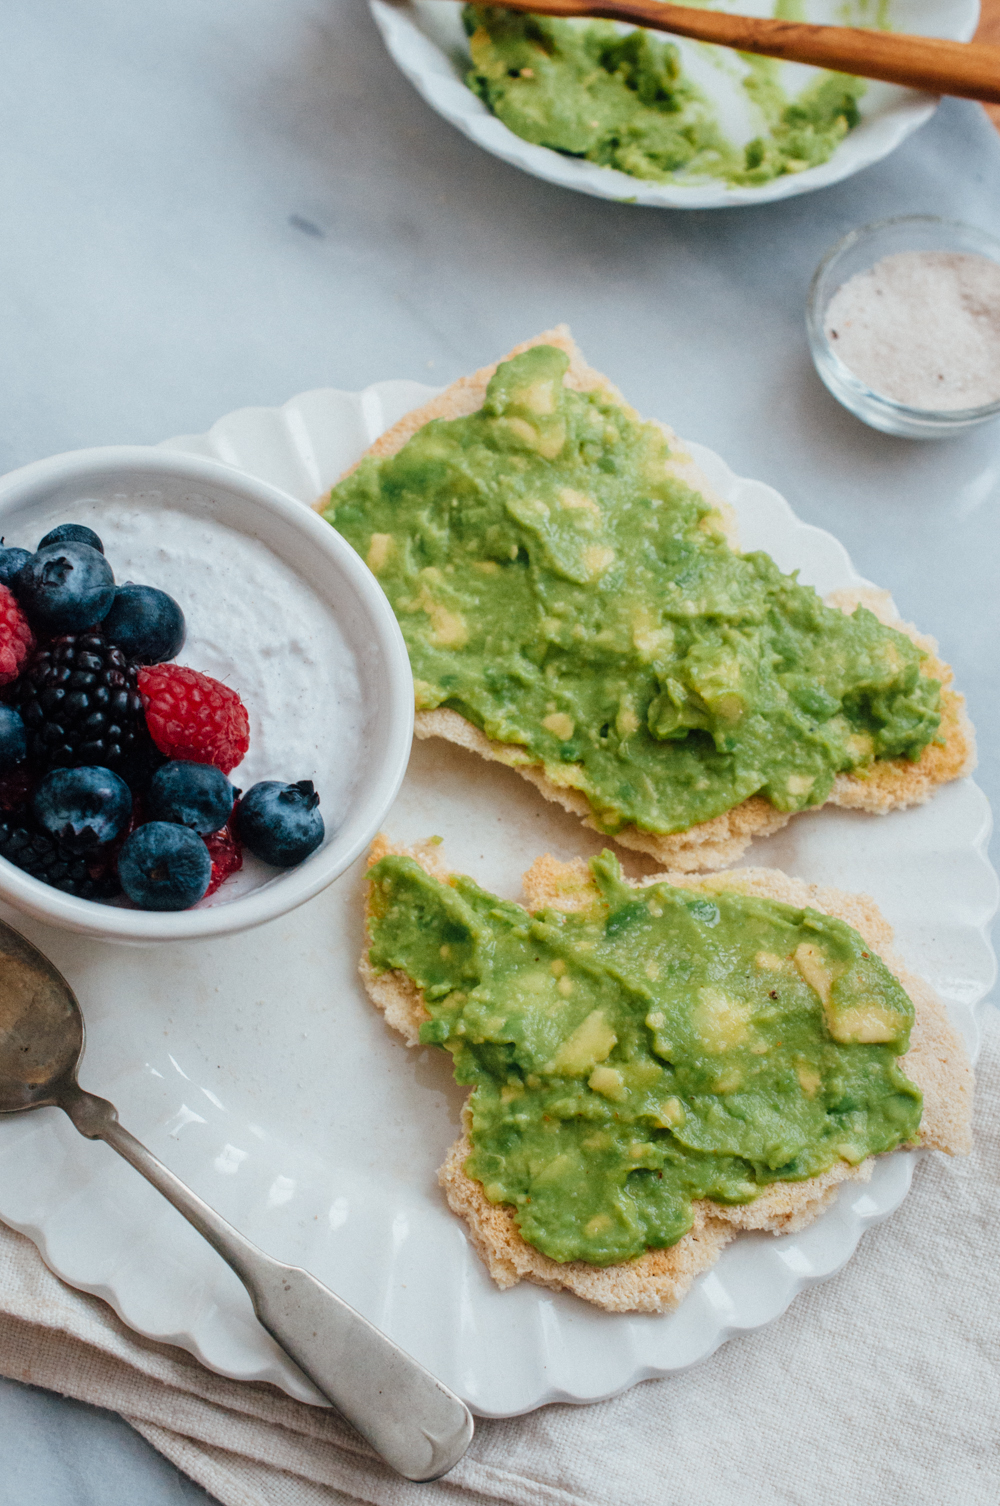
To celebrate the Amazon debut of Yucan Crunch, I’m sharing my super easy avocado “toast” recipe. This is another recipe that almost isn’t a recipe due to how simple it is. But goodness, it is so tasty & really feels like a treat when I make it. Most often I’ll have the avocado toast plain, but it’s also delicious topped with smoked salmon or prosciutto.
Avocado “Toast” + a Yucan Crunch giveaway (AIP & Paleo)

Mission Heirloom has graciously agreed to give one of my readers FREE 4-pack of Yucan Crunch. Leave a commend on this post sharing how you'd most like to use Yucan Crunch crackers. This giveaway is only open to US residents and will run until Monday April 10, 2017.


Disclosure: I did receive a complimentary 4-pack of Yucan Crunch; however, this is a product I have happily purchased in the past & will continue to purchase in the future. I would never recommend a product I didn’t stand behind 100%. 

Avocado “Toast" 
yields 1 serving

1 avocado
juice from 1/4 lemon
Yucan Crunch, broken into large (or small) pieces
truffle salt, as needed (or other finishing salt of your choice.

  1. In a small bowl, mash the avocado with the lemon juice. 
  2. Spread the avocado/lemon mixture onto pieces of Yucan Crunch
  3. Sprinkle with truffle salt. Eat immediately :) 

Note: some people prefer to toast their Yucan Crunch in a skillet or under the broiler, but I most often prefer it un-toasted. Feel free to do either, depending on your own preferences. Please DO NOT toast it in an actual toaster, as it could cause a fire if pieces break off into the toaster. 

Avocado “Toast” + a Yucan Crunch giveaway (AIP & Paleo)
    This post contains affiliate links, meaning Sweet Treats makes a small commission off items purchased 
    after an Amazon link is clicked with no additional cost to you. Thanks for your support.

Sunday, November 2, 2014

Tapioca Pudding Porridge with Roasted Apples (AIP & Vegan)


Hot cereal is one of my comfort foods. Stovetop oatmeal, baked oatmeal, cream of wheat/cream of rice, rice pudding--they’re all things I’d love to eat for breakfast in my pre-AIP days. Even though I’ve finally trained myself to eat savory things for breakfast, there still are some days when I want to revert to the comfort that comes from hot cereal for breakfast.


This tapioca pudding porridge can do double duty: it works both as a dessert AND as an occasional breakfast treat.  Of course, it’s totally AIP and paleo (but still delicious, for those non-AIP/paleo readers). And please banish any thoughts of ready-made tapioca pudding snackpacks (like the ones you perhaps had in childhood)--this pudding is not remotely similar :)


It takes a little planning to make--the tapioca pearls require soaking--so I prefer to make it in the evening (soaking the pearls while we’re eating dinner & simmering the pudding afterwards) & then sometimes I eat a little of the leftovers for a breakfast treat (along with some protein).


Since it’s fall right now, and apples are in season, I roasted some to serve on top of the pudding porridge.  Other fruit could be substituted, or the pudding can be consumed all on it’s own.


Tapioca Pudding Porridge 
yields 3 to 4 small servings 

44 g / 1/4 c Small Pearl Tapioca
6 fl oz (3/4 c) Filtered Water
1-13.5 oz can Organic Coconut Milk
1 tsp Vanilla Extract (make sure it’s AIP compliant!) 
20 g / 1 Tbl Real Maple Syrup 
  1. Combine the tapioca pearls & filtered water in a small sauce pan. Allow the pearls to soften for at least an hour. 
  2. Once the pearls have softened, add the coconut milk, vanilla extract, and maple syrup. Bring to a simmer over medium high heat, stirring often. When the mixture simmers, reduce the heat to medium low & continue cooking, still stirring, until the pudding thickens & the pearls begin turning translucent, approximately 15 minutes total. 
  3. Cool the slightly. Serve either warm (my preference) or refrigerate until cold. Top with roasted apples (recipe follows). 

Roasted Apples
1 large organic Apple, peeled & diced
1-2 tsp local Honey (not vegan) or Maple Syrup, depending on sweetness of the apples  
1/2 tsp Homemade Pumpkin Pie Spice (AIP)  (or substitute regular pumpkin pie spice, if not AIP) 
  1. Preheat the oven to 350 F. 
  2. In a small baking dish, mix together the apple, coconut oil, sweetener & spices. 
  3. Roast in the preheated oven until the apples are soft, approximately 45 minutes.
This post contains affiliate links. Thanks for supporting Sweet Treats.  

Friday, June 27, 2014

Carob Avocado Mousse (AIP)


When thinking about avocados, most peoples’ minds go immediately to guacamole or salads. But lately I’ve been reconsidering the uses for avocados, specifically when it comes to desserts. 


 The avocado’s flavor is somewhat ambivalent--it can be used in savory applications, as well as in sweet. It plays off of the flavors of items used with it. Mash avocado with some salt, lemon/lime juice & garlic powder, creating a simple guacamole (which also happens to be one of my staple items these days) Or, blend the avocado with honey, coconut milk & carob/cocoa powder, creating a luscious, “healthier” dessert. Both items (or really any avocado item) can be a little on the rich side, so portions might be smaller than you’d normally think. But due to the higher fat content, you’ll feel more satisfied even with eating less.


Using carob is not something I’ve explored until recently. I’m still following my doctor suggested detox diet, which is basically a more extreme version of the Autoimmune Protocol (commonly referred to as AIP). Both my doctor-suggested-diet and AIP put chocolate on the "avoid" list, hence, no cocoa powder. Enter carob powder, a great alternative to chocolate & cocoa powder. It doesn’t taste *exactly* the same as chocolate--my husband likes to say it has more of a roasted peanut taste--but when you can’t have the original, you settle for the next best substitution.


 The slightly nutty carob paired with the creamy avocado, sweetened with a touch of honey (which I recently had the ok from my doctor to add small amounts into my diet! yay!), and lightened with a little coconut milk to make it a bit more pudding/mousse-like.  A perfect little treat to satisfy my sweet tooth, while still staying within my dietary guidelines & ensuring I won’t regret eating it later.


Carob Avocado Mousse
makes approximately 4 servings 

2 Organic Avocados, ripe but not brown (mine weighed 10.5 oz / 207 g, without pits & skin)
2 Tbl (42 g) Organic Honey (local preferred) 
5 Tbl (30 g) Carob Powder (could sub cocoa powder, if preferred) 
  1. Place all ingredients into a high speed blender or food processor.
  2. Blend on high speed until everything is combined, scraping the sides as necessary. 
  3. Portion into cups & refrigerate a couple hours before serving. 

Notes: 
  • If you're not following an Autoimmune Protocol, feel free to substitute cocoa powder instead of the carob. The carob will give the mousse a slightly more toasted flavor. 
  • The mousse can be frozen for a delicious frozen treat 

This post contains affiliate links. 

Monday, May 19, 2014

Coconut Whipped Cream (AIP)


I have a love/hate relationship with coconut whipped cream.  Ideally, one is supposed to be able to refrigerate a can of coconut milk overnight, open the can, scoop off the solids & whip them into amazing “whipped cream.” This is NOT always the case.


As you can see in this picture I posted on Instagram a couple weeks ago, I’ve had my fair share of coconut whipped cream failures... I asked others what they did to ensure that the coconut milk would actually whip into usable cream & I received some good tips. Two pieces of advice that I took to heart were 1) to use Trader Joe’s Coconut Cream (which is *still* unsweetened) and 2) to open the can from the bottom, after the refrigeration process.


Using those words of wisdom, I made a successful batch of Coconut Whipped Cream that fit with my detox specifications and felt like a decadent treat, when spooned on top of berries. I found my berries were sweet enough that I left my “cream” unsweetened (whether through stevia, or, if you’re not on a detox diet, powdered sugar).


Coconut Whipped Cream 

1 can of Trader Joe’s Coconut Cream
1 tsp Vanilla Bean Paste/extract (omit for AIP)

optional: sweetener of choice, such as honey or maple syrup

  1. Chill the can of Trader Joe’s Coconut Cream in the refrigerator overnight.  
  2. The following day, flip the can upside down & open the can from the bottom.  Drain out any liquid & use it in something else (like add it to a smoothie). Scoop the remaining solids into a bowl. 
  3. Using a hand-held mixer, whip the solids for a couple minutes, or until the cream forms soft peaks. 
  4. Add the Vanilla Bean Paste & optional sweeteners & mix to combine. If a more firm texture is desired, re-refrigerate for 10 minutes before serving. 
  5. Use as you would use regular whipped cream--here, I spooned it over some berries. 
  6. Store leftovers in an airtight container in the refrigerator for a couple of days, though re-whipping may be required. 

Monday, November 11, 2013

Red Lentil Chili

To continue my “Week in the [Project] Life” series for Project Life 365, today’s prompt is #lunch.  My interview for Project Life 365 will be featured on their blog too! For background on this project, please read my previous #breakfast post. You can find me on Instagram @lauravein and Project Life 365 at @projectlife365.

#lunch: Red Lentil Chili with Scallions & Sour Cream

Hands down, my favorite lunch item is soup. Or stew. Or chowder. Or chili. I don’t discriminate :) Especially as the weather finally cools down, there is nothing quite like sitting down with a bowl of steaming soup & a hunk of your favorite bread (whether it is gluten free or just a regular loaf).


When it comes to making pastry items, I am very particular about having recipes & following them explicitly.  But when it comes to soup, all that rigidity falls away. I become this whole different person who *gasp* doesn’t always cook with a recipe... who adds a little more of this or that based on what I have on hand... who uses a recipe solely as inspiration.  I am learning, though, that it isn’t a bad idea to write down the ingredients I use & perhaps an approximation of their amounts so that I don’t find myself wishing in the future that I could remember what I put in a particular batch of soup that we really liked.

I also like to make soup in big batches & freeze it in individual portions.  There’s nothing nicer than looking into the freezer & seeing a multitude of lunch options, especially if we happen to be low on other groceries.


Last spring, when I was working in Atlanta and Alabama, we served Tami Hardeman Boutte’s “Red Lentil Chili” {LINK} which was a total game changing soup for me!  The flavor is spectacular & it is SO easy to make--the whole batch is ready in under 45 minutes. Although this soup is technically vegan (before you add the optional sour cream), even my carnivore husband enjoys it! The red lentils are so “meaty” that you won’t even notice there isn’t actual meat in it. And it is very affordable to make a big batch.  If I plan to freeze any of this soup, I undercook the lentils just slightly in the initial cooking process because I don’t want them to turn out too mushy once the soup is thawed & reheated.


Two words of advice: Make this soup! Pronto! You deserve a decent, hearty lunch :) And don’t skimp on using good smoked paprika!


Check back tomorrow for my #dinner post!  

Red Lentil Chili (Gluten Free)
Slightly adapted from Running with Tweezers 
makes 4 servings, but can easily be doubled or tripled 

Due to some health issues, I can no longer eat spicy food, so I toned down the soup just slightly, but my husband, who still loves & can eat spicy things, usually adds some crushed red pepper & extra Sriracha to his portions. 

2 tablespoons Olive Oil
1 medium yellow onion, diced
1 large carrot, peeled and diced
1/2 jalapeño, finely diced, (remove the seeds for less heat, or leave them in) 
1 cup red lentils, rinsed & picked over
2 1/2 cups water (add additional water if you prefer a thinner soup) 
1 15 oz. can chopped tomatoes
1 tbsp. tomato paste
1 tbsp. smoked paprika
2 tsp. light brown sugar
1 tsp. cumin
1 tsp. Sriracha or preferred hot sauce
salt and fresh ground pepper, to taste

sour cream, optional, to garnish
chopped scallions, optional, to garnish
crushed red pepper & additional Sriracha, optional, to garnish 
  1. In a large stock pot, heat the oil over medium heat.  Add the onion & carrot & saute, stirring occasionally, for 4 to 5 minutes, or until they begin to soften. Add the jalapeno & saute 1 to 2 additional minutes. 
  2. Add the remaining ingredients (minus the garnish scallions) and stir to combine. 
  3. Bring the chili to a boil, then cover, reduce the heat to a simmer & cook until the lentils are cooked, approximately 25 minutes, depending on the freshness of your lentils.  Add additional water if a thinner soup is preferred.  
  4. Add salt and pepper to taste.  Serve the chili topped with garnishes of choice.  Store any leftovers in an airtight container for up to a week, or freeze for longer.  The freezing process may cause the lentils to break down a bit once the chili is reheated.  

props
Soup Pot: Le Creuset
Bowls: Pier 1 and Anthropologie 
Spoons & Trivet: vintage 
Linens: striped napkin from At Home in Birmingham