With the holiday season upon us, I've been working on some special items for Small Batch. One item is this Buche de Noel (also known as a yule log) with meringue mushrooms.
Buche de Noel, along with many other Christmas treats, are not difficult to make, but they are time consuming.... And many people this time of year simply are too busy to make one themselves. So, Small Batch will be making Buche de Noel, as well as other holiday specials decorated gingerbread or sugar cookies and cookie platters.
Since this Buche de Noel is a Small Batch item, I can't share the full recipe with you. But I can share the recipe for the meringue mushrooms. Aren't the mushrooms just so adorable? French meringue, melted chocolate chips, cocoa powder & patience are the only ingredients necessary to make your own meringue mushrooms. One word of caution, I wouldn't make these mushrooms on a rainy or especially humid day.... Meringue and humidity do not mix, and soggy, sticky mushrooms are usually the result :(
Of all the meringues, french meringue is the easiest to make. Egg whites (absolutely NO yolk present), granulated sugar & a little cream of tartar are beaten together until stiff peaks are formed. Cream of tartar helps to keep the meringue white, in case you were wondering. No heating involved, like is needed for swiss or italian meringues.
The thick, white, glossy meringue is placed into a piping bag fitted with a large round tip. Don't worry about your piping skills (or lack-thereof) . Remember that mushrooms are rustic. They grow in nature. No two are exactly the same. Plus, once they're decorated and placed on a dessert, everyone will be so busy gushing over their adorableness that no one will notice any irregularities.
Mushroom caps are piped onto one parchment-lined baking sheet. Mushroom stems are piped onto another. Why separate pans? Just in case they bake at different rates. If they're on separate pans, they can be removed from the oven at different times, if it is necessary. The meringues are baked at a low temperature to make them hard and crispy, but not to brown them at all. The mushrooms should be white before they're baked AND after they're baked.
Once the meringues are cooled, the assembly process begins. Using a toothpick or sharp paring knife, a small hole is made in the bottom of each cap so that the caps & stems can be joined. The tops of the caps are dusted with a little bit of sifted cocoa powder. Melted chocolate chips are used to paint the bottom of the cap to look like the mushroom gills. The chocolate is also piped into the hole to join the caps & stems. Once they are joined, the chocolate just needs to harden before they are ready for use.
After the chocolate hardens, immediately use the mushrooms on something like a yule log, or store them in an airtight container. They should (fingers crossed) last for a couple weeks before becoming soggy.
Meringue Mushrooms
adapted from Joy of Baking
yields approximately 24 mushrooms
2 large egg whites, completely free from yolk
1/4 tsp cream of tartar
100 g Granulated Sugar
1 oz Chocolate Chips, melted
Cocoa Powder, for dusting
1. Wash the bowl to a stand mixer to ensure it is completely free of any fat particles that may cause the meringue not to increase in volume.
2. While the eggs are still cold, separate them into whites and yolks. Place the whites into the clean mixer bowl. Cover and allow to sit at room temperature to warm up.
3. Preheat the oven to 200 F. Line two baking sheets with parchment paper. Fit pastry bags with large round tips (I used an Ateco size 808 for the caps and size 804 for the stems).
4. Combine the granulated sugar with the cream of tartar.
5. Once the egg whites have come to room temperature, whip them, using the whisk attachment, until foamy. Add the sugar/cream of tartar mixture. Increase the mixer speed to high & whip until the sugar is completely dissolved and the mixture holds stiff peaks. During mixing, scrape down the bowl a couple of times to ensure the sugar has not collected on the sides of the bowl. To test if the meringue is at stiff peaks, remove the bowl from the mixer, swirl the whip attachment around the bowl a couple of times, then raise lift the whip attachment out of the bowl and turn it over. If the peak on the top of the whip stands straight up, it has reached stiff peaks. If it falls over, beat the meringue a little longer.
6. Once the meringue reaches stiff peaks & has become very thick and glossy, portion approximately 2/3 to 3/4 of the meringue into the pastry bag fitted with the larger tip and the remaining meringue into the bag fitted with the smaller tip.
7. On the parchment lined sheet pans, pipe caps onto one pan and stems onto another. For the caps, pipe even rounds of meringue. Try to make as even as possible. Once the volume & size you desire is reached, immediately stop pressure on the piping bag & swirl clockwise to end. If you end up with a little bit of a peak, dip your finger in a little water and smooth out the top. But don't stress too much... after all, the mushrooms should look natural and rustic. I like to pipe different sizes of caps, some small and some larger.
8. For the stems, use the smaller tip to pipe a cone shape. Make sure to pipe the base wide enough to hold up the mushroom caps. As you pipe, lift the bag upwards, release pressure on the bag & swirl off. Sometimes the bases fall over during the piping or baking process, so give them some additional room between & pipe a few extras.
9. Once the shapes are piped, place them into the preheated oven. Bake for 45 minutes, leaving the oven door shut throughout. At the 45 minute mark, rotate the pans and continue baking for another 15 to 20 minutes, or until the meringues are hard, but have not developed any color.
10. Once baked, allow the meringues to cool completely.
11. To assemble, use a tooth pick or sharp paring knife to carefully make a small hole in the bottom of each mushroom cap--the hole should be just large enough to fit the tips of the mushroom stems. Use a fine sifter to sift a little cocoa powder "dirt" over each mushroom cap. A dry brush may be used to smudge the cocoa, if desired.
12. Paint the bottom of the caps with chocolate to make the mushroom gils & pipe a little chocolate into each hole. Fit the tip of the seem into the cap. Set back on the pan and allow the chocolate to set completely.
13. Once the chocolate has completely hardened, use the meringues immediately or store them in an airtight container at room temperature until ready to use. Caution, do not refrigerate the meringues or they will become soggy!
Monday, December 3, 2012
Wednesday, November 28, 2012
A tale of 2 salads & Charleston outtakes
After all the overindulging Thanksgiving typically brings, it is nice to have a few healthy, but satisfying & delicious recipes in your repertoire. Especially as we move into the busy holiday season, it is important to take care of ourselves!
Charleston Outtakes
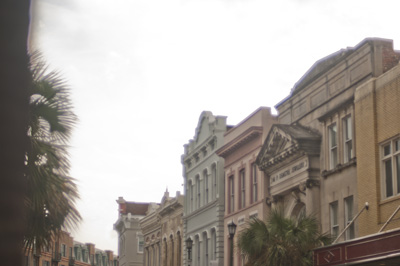
I truly believe part of my heart will always live in Charleston. I don't know if I really realized how much I have missed the area until I came back (this time as a visitor). Charleston will always be a special place to me. I appreciated being able to visit the familiar sites of my favorite city, as well as being able to reconnect with dear friends whom I greatly miss!
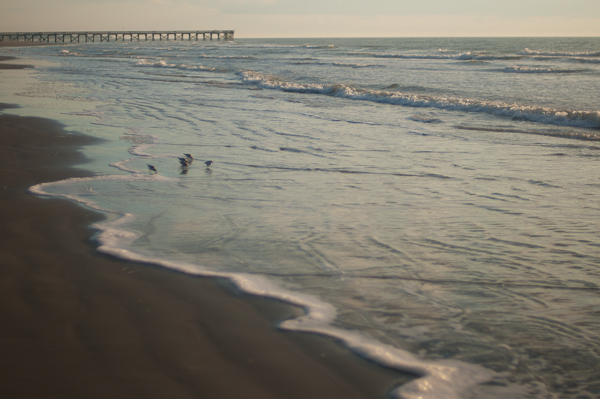
The Isle of Palms Beach in the morning(s), when I probably should have been sleeping.... But there is something almost therapeutic about the beach, especially in the morning....
The Isle of Palms Beach in the afternoon...
Lunch at 181 Palmer (the downtown CIC restaurant) with Helene & Clare (and then at Relish in North Charleston with Sandra & Ashley, though I only took cell phone pictures there).
Visiting Kudu Coffee (yay for an actual coffee house!).
In my last post I shared many photos of the Charleston Photo Workshops. But, I also wanted to share a few of my favorite non-workshop images (caution, there are a good number of images), along with two participant-requested salad recipes.
Charleston Outtakes
I truly believe part of my heart will always live in Charleston. I don't know if I really realized how much I have missed the area until I came back (this time as a visitor). Charleston will always be a special place to me. I appreciated being able to visit the familiar sites of my favorite city, as well as being able to reconnect with dear friends whom I greatly miss!
The Isle of Palms Beach in the morning(s), when I probably should have been sleeping.... But there is something almost therapeutic about the beach, especially in the morning....
The Isle of Palms Beach in the afternoon...
Lunch at 181 Palmer (the downtown CIC restaurant) with Helene & Clare (and then at Relish in North Charleston with Sandra & Ashley, though I only took cell phone pictures there).
Lunch with Liz at Butcher & Bee
(I may forever dream of the chicken liver mousse with blackberry jam).
Visiting Kudu Coffee (yay for an actual coffee house!).
Lentil Salad with Roasted Beets & Apricots; Greek Quinoa Salad
And now back to those salads, as previously mentioned. When you're preparing food for an all-female group, there's bound to be a few salads. But we didn't want any run-of-the-mill salads... They needed to be different (not just lettuce based) & beautiful & above all, tasty.
This Greek quinoa salad and lentil salad with roasted beets & apricots were two of my favorites. I enjoyed them so much that I re-created them at home, both so that I would not forget the recipe, and also so that I could eat them again!
Both salads are easy to make (and easy to modify to your taste preferences). They last well in the refrigerator, if they aren't eaten immediately. Each salad works as a side dish or as a main dish--since they're quinoa and lentil based, they have good levels of protein. They are both vegan, until you add the optional cheese, but that does not make them any less delicious!
After all the Thanksgiving indulging, I believe salad lunches are quite perfect :) Everything in moderation (including moderation). And I promise, these salads won't feel like moderation.!
Lentil Salad with Roasted Beets & Apricots
To roast the beets, I simply wash and peel the beets before cutting them into cubes, tossing them with olive oil & salt and pepper, and roasting them in a 375 F oven for approximately 30 minutes (or until they're caramelized & soft).
1/2 c French lentils, rised & picked over
1 c water
1 c roasted beets (see note above)
1 whole scallion, coarsely chopped
1/2 c dried apricots, chopped
1 Tbl chopped parsley
7 Tbl simple vinaigrette (recipe follows)
crumbled goat cheese (optional)
1. Combine the lentils and water in a sauce pan. Bring to a full boil, then reduce the heat and let them simmer, uncovered, for approximately 18 minutes. When they are done, they should still have a bit of "bite" & not be mushy at all. Remove from the heat and cool completely.
2. Once the lentils have cooked and cooled, add the beets, scallion, & apricots. Toss well. Add vinaigrette & parsley. Gently stir to combine.
3. Serve room temperature or chilled. Crumbled goat cheese may be added on top, if you wish. Store leftovers in the refrigerator. Additional vinaigrette may be necessary after the salad has sat in the refrigerator.
Greek Quinoa Salad
When I created this salad for the photo workshop, it was for a picnic/lunch-themed photoshoot. I had several goals: 1) to make a salad using things we already had, 2) to make a salad that would be tasty for participants to eat after they finished photographing, and 3) to make a salad that would be colorful and photogenic. The result was this spin on a greek salad. In the original salad, I included chopped olives, but to be completely honest, I HATE olives.... So I left them out of my re-creation :) If you like them, feel free to add olives yourself.
1 c Dry Quinoa, rinsed
2 c Water
1.5 c Cucumber wedges
1.5 c red & yellow grape or cherry tomatoes, cut in half if grape tomatoes or in quarters if cherry
1.5 whole scallions, chopped
2 Tbl chopped parsley
6 Tbl simple vinaigrette (recipe follows)
1/2 c crumbled Feta Cheese (optional)
Black olives, chopped (optional)
1. Cook the quinoa and water according to the package directions. Once cooked, remove from heat, fluff with a fork & allow to cool completely.
2. Once the quinoa is cooled, add the cucumber, tomatoes, scallion, parsley & vinaigrette. Gently stir to combine.
3. Serve room temperature or chilled. Add the crumbled feta cheese & optional olives just before serving. Store leftovers in the refrigerator. Add additional vinaigrette as needed.
Simple Vinaigrette
Once I learned how to make simple vinaigrette, I completely stopped buying store-bought salad dressing. Instead, I keep small mason jars of variations on this vinaigrette in my refrigerator. All I do is let it warm up a bit and shake it before serving. This recipe makes enough for both the lentil and quinoa salads, with a little leftover as well.
1 tsp Dijon Mustard
2 Tbl Red Wine Vinegar
4 Tbl Olive Oil
Pinch of Salt & Pepper
1. Combine all ingredients in a mason jar. Tightly screw on the lid & shake to combine.
2. Pour over salad (less is more). Store any leftovers in the refrigerator.
Note: most of the time, I just eyeball the measurements in the jar. 1/3 of the jar gets vinegar, 2/3 of the jar gets olive oil. Add a squirt of dijon and a little salt & pepper. Shake the jar well & it's ready to serve. So simple. Sometimes, I add a little grated garlic or shallot to give it some extra zip...
Tuesday, November 20, 2012
Honey Pecans & Charleston Photo Workshops Recap
Honey roasted pecans
For the past nearly 3 weeks, I've been back in Charleston at a beautiful beach house on Isle of Palms.
our beach house for the workshops
I've been working as the kitchen manager/chef for two photo workshops taught by food photographers Helene Dujardin, Clare Barboza, with the second workshop also featuring food stylist Tami Hardeman.
For each workshop/retreat, we had 12 women staying under one roof, and eating/sleeping/breathing/learning the ins and outs of food photography. These women, although strangers to begin, formed tremendous bonds & great friendships throughout the course of the weekend. While we had a few "local" participants, most flew in from places as far away as New Zealand, Hungary, Japan, and Canada!
during the intro information sessions
My role was to keep them well fed (heaven forbid anyone should attend a food photography workshop and be hungry), as well as to assist with coordinating food for the food photo shoots. I had some help from a few Culinary Institute of Charleston students who volunteered their time. I couldn't have done it without them!
BL: Helene & Clare assist students at WS2; BR: Maggie checks her image at the Farmers' Market
TL: Claire's Antipasto Shoot set up; TR: Eggs and Radishes from the Farmers' market
BL: a student's dessert shoot set up from WS 1; BR: Tami helps Chiaki with a wrap for the picnic photo shoot
Outside of the food photo shoots set up in the beach house, there was also down time to visit the beach (we were staying at a beach house, after all!)...
BL: Christina & Julie walk towards the beach; BR: Liz captures a few shots of the foggy beach
...a chance on Saturday morning to document the bounty of the Charleston Farmers's Market...
TL: a barista making my mocha; TR: part of the market
BL: Nigel, the ENORMOUS bullmastif we met at the market; BR: my finished mocha
TL: heirloom tomatoes; TR: beautifully colored radishes
BL: lovely beans ; BR: cheerful zinnias
TL: Lots of cameras at this restaurant! TR: Kyle gets a shot of the bar
BL: Libby takes a photo; BR: a self portrait
interior shots at Lana
T: Helene talks to the guys on the line
BL: Chef John Ondo; BR: table set & special menu for our group
T: Bread sliced for table service
B: Appetizers for the first workshop
The amazing vegetable plate at the first workshop's dinner
Dessert!
TL: Gelato (Gluten Free!) from WS 1; TR: Olive Oil Cake from WS 1
BL: Honey Panna Cotta with Figs from WS 2; BR: Gelato consumed from WS 1
TL: Bill, Helene, & Julie from WS 2; TR: Tami from WS2
B: Kyle & Stacy from WS 2
T: Liz & Lisa from WS 2
M: Liz, Lisa & Maggie from WS 2
B: Chiaki from WS 2 (with back of Sylvie & Kyoko's heads)
Helene and Clare make it their mission at these workshops to have each participant develop their own food photography style, rather than just copying how Helene and Clare shoot. At the end of the workshop, due to participant request, Helene and Clare did demonstrate how they set up a shot (with Tami assisting at the second workshop). Tami also brought out her styling tweezers (where her blog gets it's title) and showed us how to style (usually not beautiful) beef stew and how to construct a sandwich for styling.
TL: The tweezers come out for styling beef stew during WS 2;
TR: Helene makes a poached egg for Anna to shoot during the brunch photo shoot of WS 1;
BL: Helene sets up a test shot for her shrimp and grits demo with Tami
BR: Tami puts the finishing mustard garnish on the sandwich she built for Clare to shoot
Clare's rustic picnic set up, with the sandwich built & styled by Tami
To close the workshops, we had one final 3-course dinner on Sunday night. One last celebration before everyone parted ways....
TL: 1st course of Roasted Root Vegetable Soup with Goat Cheese & Radish Tartines
TR: 2nd course of Roasted Steelhead Trout over Rosemary Thyme Roasted Potatoes with a green salad
B: Coriander Lemon Pot de Cremes with Black Pepper Shortbread
I am so very thankful for the opportunity to work and learn alongside such amazing, talented women. It has warmed my heart to have these new friendships & to see how their photos (and confidence) improved throughout the course of the workshops. I look forward to seeing their future work!
Much of the food I prepared during the course of the workshops were things of Helene's creation. These honey pecans, which we served on the opening night's ice cream bar, are one such item. Except, we made them without a recipe (*gasp*). Several participants have requested a formula for the honey pecans, so I have come up with one.
While they are really quite simple to make & wonderful to eat on their own, they also make a wonderful addition to an ice cream sundae already topped with homemade sauces. Or, like the Japanese ladies did during the second workshop, sprinkled on top of a freshly toasted, cream cheese smeared bagel. Enjoy!
Honey Pecans
with Thanksgiving in just a couple of days, these versatile nuts could be a welcome addition to any menu. Eat them on their own. Toss them into a green salad. Top a sweet potato casserole or pumpkin with them.
3/4 c Pecans (approx. 2.8 oz)
1 Tbl Honey (approx. 19 g)
1. Preheat oven to 350 F. Line a baking sheet with parchment paper.
2. Mix the pecans and honey together until the pecans are well coated. Pour out onto the prepared baking sheet.
3. Roast for approximately 10 minutes, or until dark, but not burned. Cool & chop, if desired.
4. Store in an airtight container.
Labels:
Candy,
Charleston,
Gluten Free,
Honey,
Pecan,
Pecans,
Travel
Subscribe to:
Posts (Atom)