Wednesday, June 26, 2013

RAWR! It's a baby shower!


This past weekend, I helped throw a baby shower for my friend Mary.  She & her husband are expecting their first baby (a boy!) in August.  We’re really so excited for them.


In honor of Mary & baby, we threw a brunch baby shower with copious amounts of amazing food, a mimosa bar (with sparkling juice for the expectant ladies), tasteful games & lots and lots of laughter! There’s nothing quite like a good celebration! Birthdays, weddings, anniversaries, babies, just because.... I’ll take any excuse for a party.  I especially like the celebrations that have specific themes AND involve real paper invitations :)


Way back in the planning stages, I was given three specific “tasks” to oversee for the shower 1) the paper products (like the invitations, food tags, signs, etc.) 2) making some of my favorite croissants and 3) thank you favors for the ladies attending to take home with them.  Paper products, croissants & favors happen to be three of my favorite things!  I had SO much fun with the preparations for this shower.


The bedding Mary picked out for the baby had really adorable dinosaurs on it. The colors from the bedding & those dinosaurs became the inspiration for the paper products & the favors.


Originally, we had planned to do chocolate chip cookies for the favors.  But on a recent trip to San Antonio, I found adorable dinosaur cookie cutters at Hobby Lobby, and I was able to convince the other host-ladies to let me do decorated dinosaur cookies instead. I packaged the cookies so that each shower attendee received a brontosaurus cookie and either a stegosaurus or a t-rex.


I’ve done a fair number of cookie designs, but these cute dinosaurs might be some of my favorites....  They do take a bit of planning & time, but are totally worth it in the end! Here’s how I created them.

  • My cookie workflow is this... 
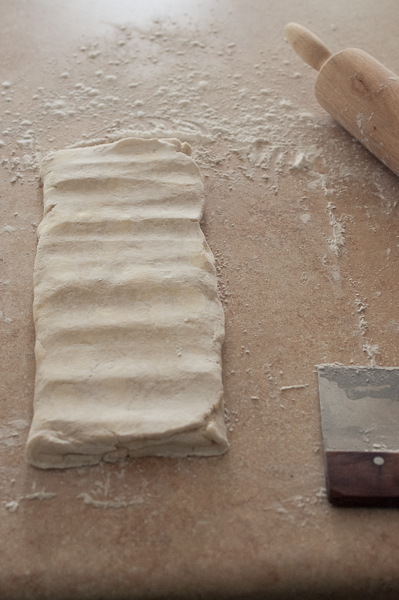
    • Day 1: make the dough. 
    • Day 2: roll out & bake the cookies.  Store in an airtight container overnight. 
    • Day 3: make icing, outline & flood cookies. 
    • Day 4: add any intricate details.
    • Day 5: package & deliver cookies. 
  • If you’d like to reference my favorite cookie recipe, read this post .  
  • The royal icing I use comes from Callye at Sweet Sugar Belle.  
  • I always use AmeriColor Soft Gel Paste Food Color to dye my icing
  • I only color as much icing as I need for each specific step & I always hold back a little original white icing in case I need to make icing thicker.  
  • Last christmas I started putting my icing into plastic wrap packets before putting them into the pastry bags & that technique has been life changing!  So much easier & less messy (plus, I can easily re-use pastry bags). 
  • Store any leftover icing in the refrigerator.  I never like to throw away any remaining icing until the cookies are all done, just in case of any accidents. Murphy’s Law does seem to love me....  


Brontosaurus cookies 
Colors used: sky blue, leaf green and a tiny bit of chocolate brown to make the body color, plus white for the dots and the eyes & super black for the pupils. 


  1. Color enough icing to both outline and “flood” the cookies. Cover with wet paper towels so that the icing does not begin to dry.  
  2. Outline the cookies with a Wilton #2 tip.  Allow the outline to dry for at least 30 minutes.  
  3. Thin down the remaining icing to make a flooding consistency & pour the icing into a squeeze bottle.  Also prepare a little white icing, also flooding consistency, to make the white dots.  Make a plastic packet of the white flooding icing & use it in a pastry bag fitted with a Wilton #1 tip.  
  4. Flood the outlined cookies with the thinned royal icing.  Use a toothpick to help move the icing out to the edges.  Flood three to four cookies in one batch.  Go back over each cookie & run a tooth pick through the icing to dislodge any bubbles.  Use the tip of the toothpick to pop any bubbles.  Immediately use the flooding white icing to make dots along the back of the dinosaur.  Remember that the white will spread, so do not place the dots too close together (or they might bleed or connect to each other).  
  5. Allow the cookie to dry overnight in a low humidity area.  
  6. To finish, once the icing has dried completely, take a little white icing (about the same consistency as the outlining icing is) & add little white dots for eyes.  Allow to dry 30 minutes. Add tiny black dots on top of the white dots to make the pupils of the eyes.  I usually put my icing into a parchment paper cone & just barely cut off the tip to pipe the eyes & pupils.  


Stegosaurus Cookies
Colors used: Lemon yellow with a tiny bit of chocolate brown to make the body color. The leftover lemon yellow/chocolate brown with a little orange added to make the dots & the spikes. White for the eyes & super black for the pupils.  


  1. Color enough icing to outline and “flood” the cookies. Cover with wet paper towels so that the icing does not begin to dry.  
  2.  Outline the cookies with a Wilton #2 tip. do not outline the individual spikes--instead make an arc underneath where the spikes would begin.  Allow the outline to dry for at least 30 minutes.  
  3. Thin down the remaining icing to make a flooding consistency & pour the icing into a squeeze bottle. 
  4. Flood the outlined cookies with the thinned royal icing.  Use a toothpick to help move the icing out to the edges.  Flood four to six cookies in one batch.  Go back over each cookie & run a tooth pick through the icing to dislodge any bubbles.  Use the tip of the toothpick to pop any bubbles.
  5. Allow the cookie to dry overnight in a low humidity area. 
  6. The following day, mix the remaining yellow icing with some white original icing to make a thicker consistency that does not flow as much... More of a “20 second” icing {LINK}. To the icing add a little orange & some additional chocolate brown to make the spike color. 
  7. Make a plastic packet of the icing & use it in a pastry bag fitted with a Wilton #1 tip.  
  8. Pipe the spike pattern & add dots over the back arch of the yellow body.  Use a toothpick as necessary to spread the icing and/or pop any bubbles. Allow to dry. 
  9. To finish, take a little white icing (about the same consistency as the outlining icing is) & add little white dots for eyes.  Allow to dry 30 minutes. Add tiny black dots on top of the white dots to make the pupils of the eyes.  I usually put my icing into a parchment paper cone & just barely cut off the tip to pipe the eyes & pupils. 


T-Rex cookies
Colors used: Leaf green with a lemon yellow and a little chocolate brown to make the body.  Additional lemon yellow added to the remaining icing to make the green stripes.  White for the eyes & super black for the pupils.


  1. Color enough icing to outline and “flood” the cookies. Cover with wet paper towels so that the icing does not begin to dry.  
  2.  Outline the cookies with a Wilton #2 tip. Allow the outline to dry for at least 30 minutes.  
  3. Thin down roughly 3/4 of the remaining icing to make a flooding consistency & pour the icing into a squeeze bottle. 
  4. Flood the outlined cookies with the thinned royal icing.  Use a toothpick to help move the icing out to the edges.  Flood four to six cookies in one batch.  Go back over each cookie & run a tooth pick through the icing to dislodge any bubbles.  Use the tip of the toothpick to pop any bubbles.
  5. Allow the cookie to dry overnight in a low humidity area. 
  6. Take the remaining quarter of the green icing & add some additional lemon yellow & a little white to make a contrasting yellow green color.  Thin the icing to make a a “20 second” consistency icing {LINK}.  Make a plastic packet of the icing & use it in a pastry bag fitted with a Wilton #1 tip.
  7. Pipe triangle-shaped stripes along the back of the dinosaur.  Use a toothpick as necessary to spread the icing and/or pop any bubbles.  Allow to dry.
  8. To finish, take a little white icing (about the same consistency as the outlining icing is) & add little white dots for eyes.  Allow to dry 30 minutes. Add tiny black dots on top of the white dots to make the pupils of the eyes.  I usually put my icing into a parchment paper cone & just barely cut off the tip to pipe the eyes & pupils. 


Friday, June 21, 2013

Gluten Free Plum Frangipan Tarts


Happy first official day of summer! It always seems, at least in the United States, that summer “begins” with Memorial Day at the end of May, but regardless of when summer actually begins, I’m glad that it’s here.  I love that many of our meals are filled with fresh, delicious fruits & vegetables.  I look forward to the many batches of jam & preserves I’ll be making.


This summer, I have been anticipating one fruit in particular: plums.

In the past, I’m not sure that I gave the humble plum the praise it is worth.  While I’ve enjoyed eating plums, they certainly were not at the top of my list of favorite summer fruits & I don’t think I had ever baked with them...


My opinion on plums changed drastically last summer/fall when, on a whim, I brought home a good amount of plums from a grocery store sale (don’t hate on the grocery store--we don’t have access to a farmer’s market! or a CSA, sadly).... I sliced & pitted the plums, & cooked them into the most delicious batch of jam I made all year.  Seriously. Possibly the best jam I’ve ever made!


Usually each batch of jam I make has a little left over that does not fit into all the canning jars.  That leftover jam goes into the fridge & we enjoy it on toast (or whatever we feel like spreading jam on).  As the first taste of the plum jam hit our tongues, we looked at each other in amazement at how good it was.  And then my husband insisted we go to the store to get MORE plums, just to ensure there would be enough jam to last us through the winter.


I have yet to make a new batch of plum jam (and we are dangerously close to running out), but I recently saw a few black & red plums on sale in the grocery store.  It felt a little early in the season for them?  But then I do need to remind myself that the growing season in Texas is much, much earlier than what I have previously been use to in North Dakota.  I decided to buy a few of the plums  to test out their flavor & also to try my hand at baking with them.


Stone fruits always pair well with almond, in my opinion.  And I also needed to make a test batch of frangipan (an almond pound cake batter) to use in some croissants I was making for a baby shower.  So, paring the plums with the frangipan was a no-brainer for me.


After making & laminating two delicious, albeit gluten filled, batches of croissant dough, I took the leap into making a batch of gluten free blitz puff pastry so that I could taste some laminated dough goodness.  I had not intended on doing a whole post on gluten free blitz puff pastry, but I realized while writing this post, which utilizes the gluten free blitz puff pastry, that many (if not most) people have never made their own laminated doughs & that the process warranted it’s own post. So, if you want to make your own gluten free laminated dough, check out my previous post.


I cut the finished blitz puff pastry into squares, egg washed the tops to help them stay shiny & become golden, dabbed on a little frangipan, and topped it with a few slices of red and black plums.  I love the color contrast between the two plum varieties!  Even though making the pastry crust was a labor of love, the rest of the tart assembly came together really quickly.


After a 30ish minute bake in the oven, and a little brush of glaze post glazing, the plum frangipan tarts were ready to eat!  The pastry was crisp & crumbly (like a good puff pastry should be), the plums provided a bit of tartness, and the frangipan (which lets be honest, I could just eat all on it’s own, raw or baked) added a sweetness to compliment the tart plums.  I ate one all on it’s own--quality control, you know. But the real stars were the ones we ate later that evening with a scoop of ice cream.


I wonder what other baked items I can make with plums? My brain is humming with possibilities of this new-to-me ingredient.


PLUM FRANGIPAN TARTS (gluten free) 
yields 6 individual tarts 

Frangipan
This recipe will make more than you need to for the six tarts, but it is difficult to scale it any smaller. Store any leftover frangipan in the refrigerator. Or bake it in greased ramekins with more sliced plums on top.

55 g Butter, at room temp 
55 g Granulated Sugar
55 g Almond Flour (see note below) 
1 egg
1/2 tsp Almond Extract 

  1.  In the bowl of a stand mixer fitted with the paddle attachment, cream together the butter and granulated sugar, on medium speed, until the mixture is fluffy & has lightened in color.  Scrape down the sides of the bowl.  
  2. Add the almond flour & mix, on low to medium speed until combined. Add the egg and almond extract.  Mix on low speed until just combined. Scrape the bowl as necessary.  
  3. Store in the fridge until ready to use.  The batter will keep in the refrigerator for several days.  


Note: if you don’t have almond flour, can use whole almonds (skins on or off) & pulse them in the food processor with the butter & granulated sugar. The texture will be more grainy, but the batter will still be delicious & work just fine. 

Assembly
2 ripe Plums, red & black, sliced thin
1/2 batch Blitz Puff Pastry (or substitute regular store bought puff pastry, which is not gluten free) 
1 egg
1 batch Frangipan
Apricot Glaze (2 Tbl Apricot Jam & 2 tsp to 1 Tbl Water), optional 

  1. Preheat oven to 400 F. 
  2. Remove the puff pastry from the freezer & allow to thaw slightly. (only slightly).
  3. Slice plums into 1/4” thick pieces, but keep the skin. 
  4. Scramble the egg in a small dish to make egg wash.
  5. Using a pastry wheel/pizza cutter or a very sharp knife, cut all the edges of the dough, so that the layers are all exposed & the dough will puff more in the oven. Cut the pastry into squares that are between 3.5 inches & 4 inches, depending on the size of the dough. Place each pastry square onto a parchment lined baking sheet. 
  6. Brush the tops of each square with a light layer of egg wash, taking care not to egg wash the sides (or else the layers will not be as visible.  
  7. Spoon one tablespoon of the frangipan onto the center of each square & spread out slightly.  
  8. Top with thin slices of plum, alternating between the red & black plums. 
  9. Immediately place the baking sheet into the oven & bake for approximately 30 to 35 minutes, or until the pastry & frangipan are golden. 
  10. While the tarts are baking, make the optional glaze.  In a small microwave safe dish (such as a ramekin), microwave the jam & water for 30 seconds to 1 minute.  Stir to make sure the water & jam combine. Reheat as necessary to keep a liquid consistency. 
  11. Once the tarts are removed from the oven, allow them to cool for a few minutes before brushing the tops with the jam glaze.  Or simply dust them with confectioners’ sugar. 
  12. Serve warm or at room temperature.  Top with ice cream, if desired.  
  13. Store any leftovers at room temperature & re-crisp in the oven before serving (DO NOT EVER MICROWAVE LAMINATED DOUGHS! Microwaves suck all of the love out of the layers of laminated doughs).  Enjoy within two days. 


Wednesday, June 19, 2013

Gluten Free Blitz Puff Pastry


This post is a little out of the normal for me. I usually like to show the pretty end product, rather than the process of getting to that end product. But today I'm going back to my teaching roots on a subject I dearly love: laminated dough.

Puff Pastry, Croissant Dough, Danish Dough... these are the three great categories of laminated doughs. They begin with two components: dough & fat (European-style butter is best, in my opinion).  The dough is wrapped around the butter & the lamination process begins.  Think about how paper is laminated: the paper is sandwiched between two layers of plastic. Laminated dough is similar, only butter & dough are used instead of paper & plastic.

Once the butter is encased in the dough, the whole thing is rolled out & folded many times until there are hundreds or thousands of alternating layers of dough & butter...and dough and butter...and dough and butter, etc.  Those layers are what causes the product to puff in the oven.

Regular laminated doughs, made with wheat flour, are a bit challenging & rather time consuming. They're a topic that I really have not been willing to attempt to make gluten free, partially because of the time they take to make.  But lately, I've been working on a couple of batches of regular wheat, gluten-filled croissant dough (for an upcoming baby shower I'm helping to host), and I was inspired to finally attempt a gluten free laminated dough.

For my first foray into gluten free laminated dough, I cheated a little bit... Instead of attempting a classical puff pastry, I went with a "blitz" version instead, which may also be known as "fast" or "rough."

Instead of making the two distinct components of dough & butter, you simply start with a dough full of large butter pieces.  That dough is rolled out & folded a series of times, similar to puff pastry. Blitz puff also will not rise quite as much as classical puff pastry, but it still has more rise than a regular pastry crust.

Baking gluten free requires me to really think about the classical baking processes & make some adjustments.  For instance, gluten free doughs are often more crumbly, partially because they do not have the strength of gluten to help hold them together & aid in elasticity.  So, I needed to anticipate & expect some cracking.  Also, because gluten free doughs are not as elastic, they cannot be rolled out under as cold conditions as I would roll out a regular laminated dough.  Usually, I store my dough in the freezer between folds, but for the gluten free dough, I used the refrigerator.

Here's how I made my version of Gluten Free Blitz Puff Pastry.  In the next post, I'll show a recipe for how to use the finished dough.  

One initial note, make sure your kitchen is not hot during this whole process. Butter melts at 80˚ F, so your kitchen needs to be below 80˚ F for the dough to be successful.  Otherwise, the butter might melt (or fuze with the layers) and all your hard work is for nothing!

Gluten Free Blitz Puff Pastry Process: 

Start by taking two sticks of butter (8 oz) and cutting them into small cubes.  I started by cutting each stick into 4 pieces, length wise, then chopping the four pieces into small squares.  Break up the chopped butter into individual pieces & place them onto a plastic-wrap lined plate.  Set the plate into the freezer while you prepare the rest of your ingredients and equipment.  


While the butter is chilling,  Prepare the rest of the ingredients and equipment. Scale into the metal bowl of a stand mixer: 8 oz of gluten free flour  (Jeanne's AP Gluten Free Mix, or another mix that contains xanthan gum), 1 Tablespoon of granulated sugar, and 1 teaspoon of fine grain sea salt. Fit the mixer with the paddle attachment & turn on the mixer to the "stir" function for approximately 10 seconds to just combine the ingredients.  Scale  5 oz of water into a liquid measuring cup & set it into the fridge to stay cold.  Finally, line a baking sheet with parchment paper & setting it off to the side.

Once the butter had been freezing for approximately 15 minutes, remove the butter from the freezer. With the mixer running on stir, begin dropping the cubes of cold butter into the dry ingredients. Paddle the butter with the dry ingredients for a total of 60 seconds, just to begin the incorporation of the butter into the flour mixture.

Next, remove the measured water from the refrigerator, turned the machine back on to stir, & gradually drizzled in the water.  Continue mixing on stir for approximately 60 seconds, or until the dough just begins to form, but very large butter pieces were still visible.


Dump the prepared dough onto the parchment-lined baking sheet.


Pat the dough into a rectangular shape.


Cover the dough  with some plastic wrap & placed into the refrigerator to chill for 30 minutes.

After the 30 minute chill, remove the dough from the refrigerator & place onto a tapioca-floured surface.  Dust the top of the dough & the rolling pin with additional tapioca flour.


Gently roll the dough out, keeping the rectangular shape, until the dough is approximately 11"x13" and about 1 cm thick. The dough may crack, especially around the edges.  Make sure the top of the dough & counter stay well floured. 


Move the dough around periodically to ensure that the dough is not sticking at all!  Especially take note to flour any large spots of butter.  


Once the dough has reached the size of 11"x13", use a dry pastry brush to brush off any excess flour from the top of the dough.  Use a second brush to lightly brush the top of the dough with a little water--not enough water to form puddles or drown the dough, but just enough to act as glue during the folding process.


Visualize dividing the dough into three pieces, like you would a piece of paper for a letter.  Fold the bottom up & press lightly to adhere.


On the flap that was just folded up, brush off any additional flour, then fold the top down over. 


Turn the dough 90˚ so that the fold line is on the left & the open ends (not folded ends) are at the top & bottom. Re-flour the counter slightly, if the dough is sticking.  Use the rolling pin to tap down the dough to ensure the fold is secure.


Place the dough back onto the parchment lined sheet pan. Cover the dough with plastic wrap & chill again for 30 minutes.  Make a notation on the parchment that the first fold is complete (so that you don't forget how many folds have been done).


After the dough has had a 30 minute "nap," remove the dough from the refrigerator & place it back onto the floured counter.  Make sure that the fold is to the left and that the open ends are at the top and bottom.  Gently roll out the dough, rolling only in the direction of the open ends.  Do NOT roll across the fold. The dough will be much longer and skinnier this time, but that is ok.


Also, the edges may continue to crack (regular gluten dough does not do this), but do not be alarmed! Roll the dough until it is approximately 1/4" to 1/8" thick (don't worry about the length of the dough).   Dust off the flour & lightly brush with water.  Fold into thirds again.


Turn the dough 90˚ again & press lightly with the rolling pin to adhere.


Place the dough back onto the parchment lined baking pan, cover again with plastic & chill for 30 minutes in the refrigerator.  Make a notation that the second fold is complete.

After 30 minutes, repeat the whole process a third time, making sure to roll only with the open ends. When the third fold is completed, chill the dough in the refrigerator for an additional 30 minutes.

At this point, the folds are all done & the dough is ready to be rolled out to it's final thickness, which does depend on how you plan to use the dough.  I rolled mine out to approximately 12"x15" and a thickness of 4mm.  I did have one section that cracked a little, but I just used some water to help patch it back together.


I cut mine into two pieces (using a pastry wheel/pizza cutter) & stacked them on a flat sheet pan with parchment paper between the two pieces.  Wrap the sheet well & place into the freezer.  Be careful  with moving the finished puff to the sheet pan--it is rather fragile! (and you don't want to break all your hard work!)


Even if you plan to use the finished pastry very soon after it is finished, it still needs to freeze for at least 30 minutes (an hour would be even better) before use.

In the next post, I'll be showing some tarts made from this blitz puff pastry :)


Here's a more condensed recipe, but use the above pictures to reference, especially if you are not accustomed to laminating dough.  

Gluten Free Blitz Puff Pastry 

Equipment needed

  • A Timer 
  • Baking Sheet
  • Parchment Paper
  • Plastic Wrap
  • Pastry Brush (two, if possible)
  • Rolling Pin
  • Bench Cutter/Bench Scraper 
  • Ruler 
  • A small dish of water 
  • A small dish of tapioca flour for dusting 
  • Pastry Wheel or Pizza Cutter

Ingredients
8 oz Unsalted Butter, cold, cut into small cubes
8 oz Gluten Free Flour (I used Jeanne's GF AP Flour mix
1 Tbl Granulated Sugar
1 tsp Fine Grain Sea Salt
5 oz cold water {NOTE: if you live in a humid climate, you may only need 4 oz of water!}
additional tapioca flour for dusting
additional water for brushing 

  1. Cut each stick of butter into small cubes. Place the small cubes onto a plastic-wrap-lined plate & freeze for 15 minutes while you prepare the rest of your ingredients.  
  2. Into the bowl a of a stand mixer, scale the flour, sugar & salt.  Fit the mixer with the paddle attachment & turn the machine on to "stir" for approximately 10 seconds to combine the dry ingredients. Scale the water into a liquid measuring cup & hold in the refrigerator until ready to use. Line a baking sheet with parchment paper. 
  3. Once the butter is cold, turn the mixer back on to "stir" & begin adding the butter cubes to the dry ingredients. Mix approximately 60 seconds, or until the butter is just beginning to be incorporated into the dry ingredients.  
  4. Remove the water from the refrigerator, and with the mixer running on "stir" begin drizzling the water in to the flour/butter mixture.  Mix approximately 60 additional seconds, or until the ingredients just begin to form a dough, but there are still very large butter pieces visible.  
  5. Dump the prepared dough onto the parchment-lined baking sheet. Pat the dough into a rectangular shape. Cover the dough  with some plastic wrap & placed into the refrigerator to chill for 30 minutes.  
  6. After the 30 minute chill, remove the dough from the refrigerator & place onto a tapioca-floured surface.  Dust the top of the dough & the rolling pin with additional tapioca flour. 
  7. Gently roll the dough out, keeping the rectangular shape, until the dough is approximately 11"x13". The dough may crack, especially around the edges.  Make sure the top of the dough & counter stay well floured. Move the dough around periodically to ensure that the dough is not sticking at all!  Especially take note to flour any large spots of butter.  
  8. Once the dough has reached the size of 11"x13", use a dry pastry brush to brush off any excess flour from the top of the dough.  Use a second brush to lightly brush the top of the dough with a little water--not enough water to form puddles or drown the dough, but just enough to act as glue during the folding process.  
  9. Visualize dividing the dough into three pieces, like you would a piece of paper for a letter.  Fold the bottom up & press lightly to adhere.  On the flap that was just folded up, brush off any additional flour, then fold the top down over. 
  10. Turn the dough 90˚ so that the fold line is on the left & the open ends (not folded ends) are at the top & bottom. Re-flour the counter slightly, if the dough is sticking.  Use the rolling pin to tap down the dough to ensure the fold is secure.  
  11. Place the dough back onto the parchment lined sheet pan. Cover the dough with plastic wrap & chill again for 30 minutes.  Make a notation on the parchment that the first fold is complete (so that you don't forget how many folds have been done). 
  12. After the dough has had a 30 minute "nap," remove the dough from the refrigerator & place it back onto the floured counter.  Make sure that the fold is to the left and that the open ends are at the top and bottom.  Gently roll out the dough, rolling only in the direction of the open ends.  Do NOT roll across the fold. The dough will be much longer and skinnier this time, but that is ok.  Also, the edges may continue to crack (regular gluten dough does not do this), but do not be alarmed! Roll the dough until it is approximately 1/4" to 1/8" thick (don't worry about the length of the dough).   Brush the flour off & lightly brush with water & fold into thirds again.  
  13. Turn the dough 90˚ again & press lightly with the rolling pin to adhere.  Place the dough back onto the parchment lined baking pan, cover again with plastic & chill for 30 minutes in the refrigerator.  Make a notation that the second fold is complete.  
  14. After 30 minutes, repeat the whole process a third time, making sure to roll only with the open ends. When the third fold is completed, chill the dough in the refrigerator for an additional 30 minutes.  
  15. At this point, the folds are all done & the dough is ready to be rolled out to it's final thickness, which does depend on how you plan to use the dough.  I rolled mine out to approximately 12"x15" and a thickness of 4mm. I cut mine into two pieces (using a pastry wheel/pizza cutter) & stacked them on a flat sheet pan with parchment paper between the two pieces.  Wrap the sheet well & place into the freezer.  Be careful  with moving the finished puff to the sheet pan--it is rather fragile! 
  16. Even if you plan to use the finished pastry very soon after it is finished, it still needs to freeze for at least 30 minutes (an hour would be even better) before use.  
  17. The frozen dough will keep, well wrapped, for several months in the freezer. Allow to thaw slightly before use. 
  18. When ready to bake, bake at a 400 F oven (or higher) to ensure optimal puff.  


Inspired by "Art of Gluten Free Baking" & by my teaching materials from the Culinary Institute of Charleston

Wednesday, June 12, 2013

Almost Instant Sangria


Most of the time, I’m the sort of person who likes to have all her ducks in a row.  Likes to have everything planned out (and possibly with back ups, just in case the first doesn’t go as planned).  I don’t like many surprises (thought if you want to surprise me with fresh flowers, I’ll never complain!).


But there’s something about summer time & spontaneity.


The past couple of weekends, we’ve had somewhat spur-of-the-moment get togethers with friends. Dinners. Brunch. Pool time.  It’s been wonderful!


Sometimes it is refreshing to not have concrete plans, (or rather to not obsess over the details).


Many summer recipes are suitable to spontaneous entertaining. Others may require a some additional forethought.  Traditional sangria requires fruit to be macerated for hours before serving. This recipe for sangria is different--it’s one you can make almost instantly! And it only requires two ingredients, plus ice.  Garnish is optional (though I do love a good garnish).


Chilled red wine is mixed with cold blood orange soda.  Ice is added.  Optional orange slices are used for garnish.  And voila! Almost instant sangria.


Want a little more “kick” to your sangria?  Add a little orange liqueur.  Prefer a little less alcohol? Use more soda.  Love the macerated fruit aspect of sangria? Add the fruit to the wine & let it sit as long as your schedule allows before adding the soda.  Need only one glass? Or a whole pitcher? It’s easy to scale the recipe to be for one or a crowd.


Just because summer plans can be spontaneous, it does not mean those impromptu gatherings (or even just a regular day) cannot include sangria!  Cheers!

Almost Instant Sangria
adjust ratio to taste... Most of the time, I don’t even measure--I just eyeball it!  If you want the sangia to have more “kick” add some additional orange liqueur.  

Single Serving 
1/2 c (4 fl oz) chilled Red Wine {I used a cheap-ish Malbec} 
3/4 c (6 fl oz) chilled Blood Orange Soda {I used San Pellegrino Blood Orange Soda
Ice
Orange Slices (optional)  
  1. In a glass, stir together the wine & soda.  
  2. Add ice & optional orange slices. 
  3. Enjoy immediately.  
For a Pitcher
1 bottle Chilled Red Wine
4 2/3 c (37.5 fl oz) Blood Orange Soda {a little more than 3 cans of San Pellegrino

This post contains affiliate links, meaning Sweet Treats makes a small commission off items purchased 
after an Amazon link is clicked with no additional cost to you. Thanks for your support.

Friday, June 7, 2013

Watermelon Mint Popsicles


A couple weeks ago, I was supposed to help throw a surprise baby shower for a friend who is expecting a little boy at the end of July.  We were planning a brunch party & I was responsible for creating a fruit salad.


I had grand ideas of carving a watermelon like a baby carriage to hold the fruit salad & creating a beautiful scene.  I even practiced once with great success.


The day before the shower, I was just getting ready to begin cutting fruit when I got the call that the shower was canceled.  The mom-to-be was experiencing contractions & was in the hospital!


 Thankfully, the doctors were able to stop her early labor, but she did  end up staying in the hospital during the time when we had planned the shower.


So, I found myself with decent sized seedless watermelon, no longer destined to become a baby carriage fruit salad vessel.  There are many ways I like to use watermelon, aside from just eating it raw.  I love Helene’s Quinoa salad with watermelon, feta, & mint.   I love a good chilled minted melon soup we use serve at Dakota Harvest Bakers when I worked there.  I’ve even had a watermelon pie!


As I was mulling what to make with this unexpected wealth of watermelon, I remembered my recently purchased, yet unused popsicle mold.  By freezing some of the watermelon into popsicles, I could prolong the shelf-life of the watermelon & allow us to enjoy the melon in the future too.


Making these popsicles couldn’t be simpler.  Cubes of juicy ripe watermelon are combined with a little sugar, and mint (which is my favorite watermelon accent flavor) in a blender & then pureed until liquid.  The mixture is poured into the molds & frozen. Voila! Popsicles!


In the summer's heat (which we've been especially experiencing lately in Texas), there isn't anything more refreshing :)


Watermelon Mint Popsicles
yields approximately 10 popsicles, depending on your mold size

4 c (approximately 1 lb 10.7 oz) chopped seedless watermelon 
2 Tbl sugar (or other sweetener), adjust amount based on the sweetness of your melon
1 Tbl mint leaves (that took around 14 leaves, for me)
  1. Combine all the ingredients in a blender.  Blitz until liquified.  Taste & adjust sweetness as needed--remember, the sweetness will lessen during the freezing process.  
  2. Stir the mixture & skim off any foam. 
  3. Pour into molds, leaving space at the top for the mixture to expand as it freezes.   
  4. Freeze for 90 minutes. 
  5. Insert the sticks.  
  6. Freeze overnight.  
  7. Unmold by dipping the bottom of the mold into a large bowl of warm (not hot) water.  Serve immediately.  
  8. Store leftovers, individually wrapped or kept in an airtight container, in the freezer for up to one month.